Setting up the Lab 1 (Vyatta) - Network Pentest
In this article, we are going to setup the lab for network pentesing using virtualization tool.
Disclaimer: The articles provided on HackWithV is purely for informational and educational purpose only, and for those who are willing and curious to know & learn about Ethical Hacking, Security and Penetration Testing. Anytime the word "Hacking" that is used on this site shall be regarded as Ethical Hacking.
Setting Up The Lab
- We need a router for pentesting. So, here we are using virtual router provided by “Vyatta”.
- Vyatta is totally software based and free community edition.
-
Refer this manual for more details:
Vyatta-QuickStart_6.5R1_v01.pdf

Practical
Step 1: Download ISO
- Download the ISO file: vyatta-livecd_VC6.5R1_i386.iso
Step 2: Create Virtual Environment on the Virtualbox
- Open virtualbox and click on new

- Give values follows
- Name : Vyatta
- Type: Linux
- Version: Other Linux (32-bit)

- The recommended memory size is 256 MB.

- Select “Create a virtual hard disk now”
- Select “VDI (VirtualBox Disk Image)”
- Select “Dynamically allocated”
- Select the size of the virtual hard disk: 8GB
- Now click on “create”
Successfully we have created the virtual environment for the vyatta router.

Step 3: Installing Vyatta ISO on Virtual Environment
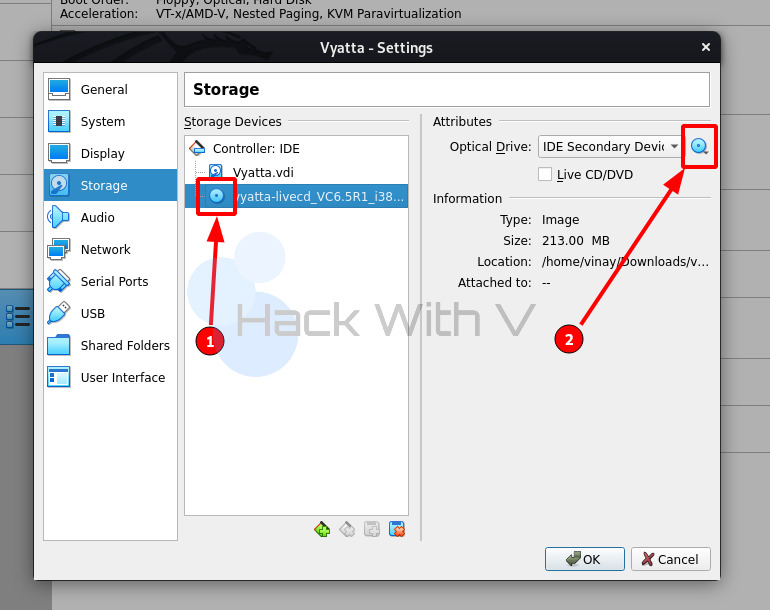
- Click on Vyatta’s machine and click on storage.
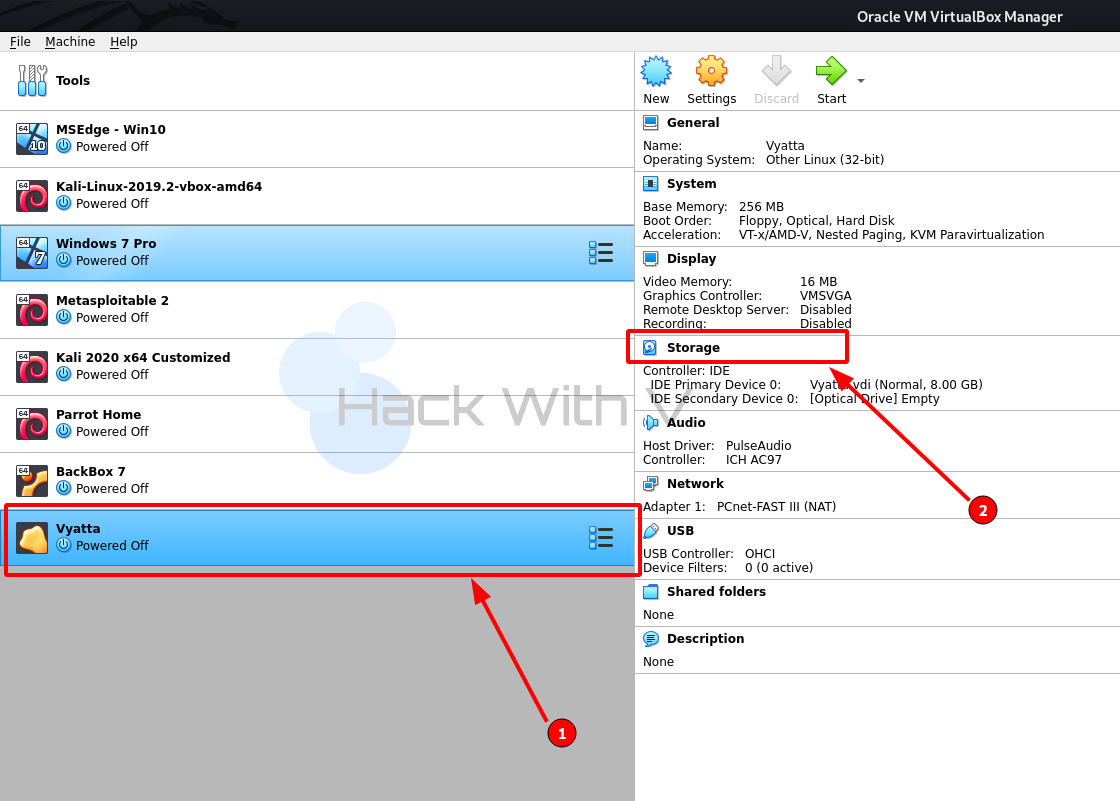
- Click on the disk icon and choose the downloaded ISO file and click “OK”.
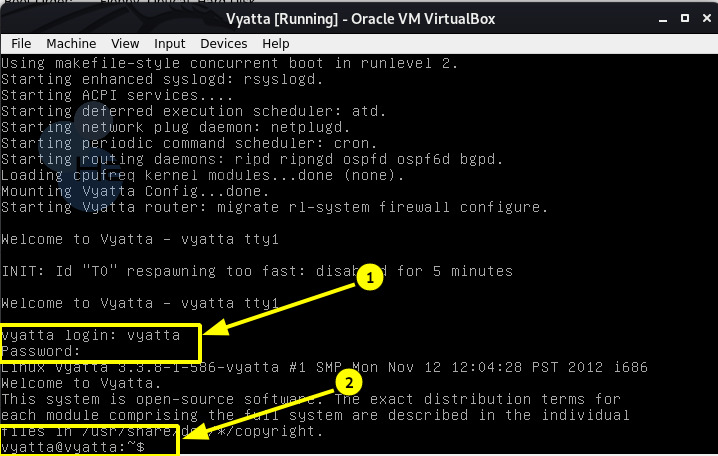
- Click on start as shown in fig

- The machine will boot and asks for username (vyatta) and password (vyatta). After login we get Linux prompt as below
- Now install it on the virtual disk created earlier as follows
- $ install image
- Would you like to continue? {yes}
- Partition: Auto
- Install the image on? : sda
- Continue?: yes
- Click enter(give entire size)
- What would you like to name this image? : VC6.6R1
- Which one should I copy to sda? : /config/config.boot
- Now set the password for admin for vyatta. In my case “vyatta123”
- Which drive should GRUB modify the boot partition on?: sda

- Successfully installed on the virtual hard disk and reboot now

- Now goto storage and remove the ISO file as follow

- Start the machine and login with username (vyatta) and password (vyatta123).
Step 4: IP Address Configuration
- Show the configuration as follows
- $ show configuration
- Setting static IP address
- $ configure
- # set interfaces ethernet eth0 address 192.168.0.90/24
- # commit
- # save
- # show interfaces
- # exit
- $ poweroff

Step 5: Change Network Adapter
- Select the vyattas machine and click on network.
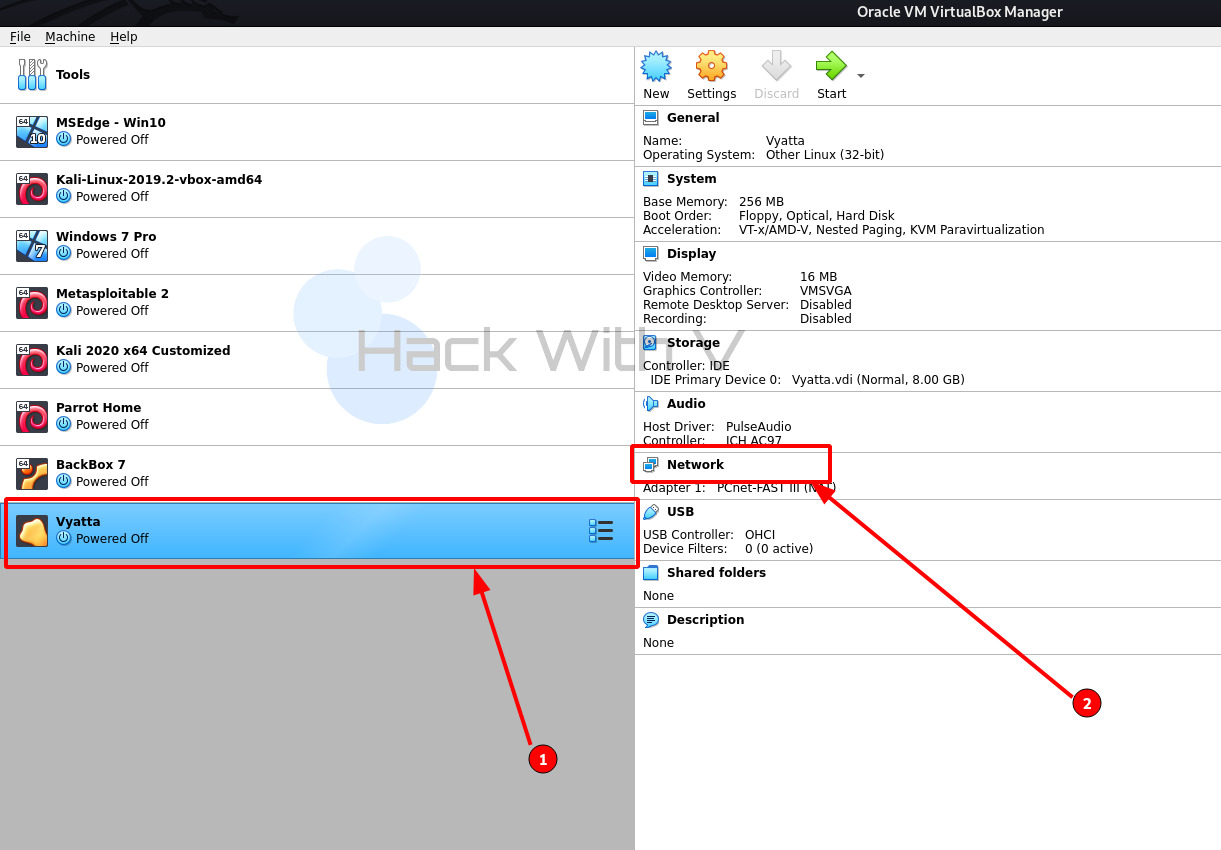
- Select the bridge adapter and choose your Network Interface Card (NIC).

- Boot the Vyatta machine and ping the vyatta machine from the kali linux machine.
- $ ping 192.168.0.90 (Kali Linux)

Step 6: SSH Configuration
- Setting SSH in Vyatta
- $ configure
- # set service ssh
- # commit
- # save

- Connect to Vyatta SSH from Kali Linux
- $ ssh vyatta@192.168.0.90 (Kali Linux)
- Enter the password (vyatta123)
- $ whoami
- Successfully logged into Vyatta machine in Kali Linux using SSH service.

Successfully the lab setting up is completed, next we will perform pentest on this router.
Be Aware, Be Secure.
Thank You 🙏


Comments
Post a Comment